If every trailer brake disappeared at once, begin at the tow vehicle, seven-way connector, controller, common power path and trailer ground. If one wheel is cold, hot, noisy or locking while the others behave normally, move toward that wheel’s wiring and brake assembly. That split prevents hours of random adjustment.
Start with the symptom before lifting the trailer
| What happens | Most useful first area |
|---|---|
| Controller says disconnected | Seven-way plug, brake-output wire, trailer ground and controller setup |
| All brakes weak | Gain/setup, loaded trailer weight, voltage drop, common ground and adjustment |
| One wheel does not brake | Local wiring, magnet, adjustment and contamination |
| One wheel locks first | Adjustment mismatch, wiring fault, contaminated or damaged assembly |
| One hub runs much hotter | Dragging brake, bearing condition or mechanical damage |
What is inside an electric drum brake
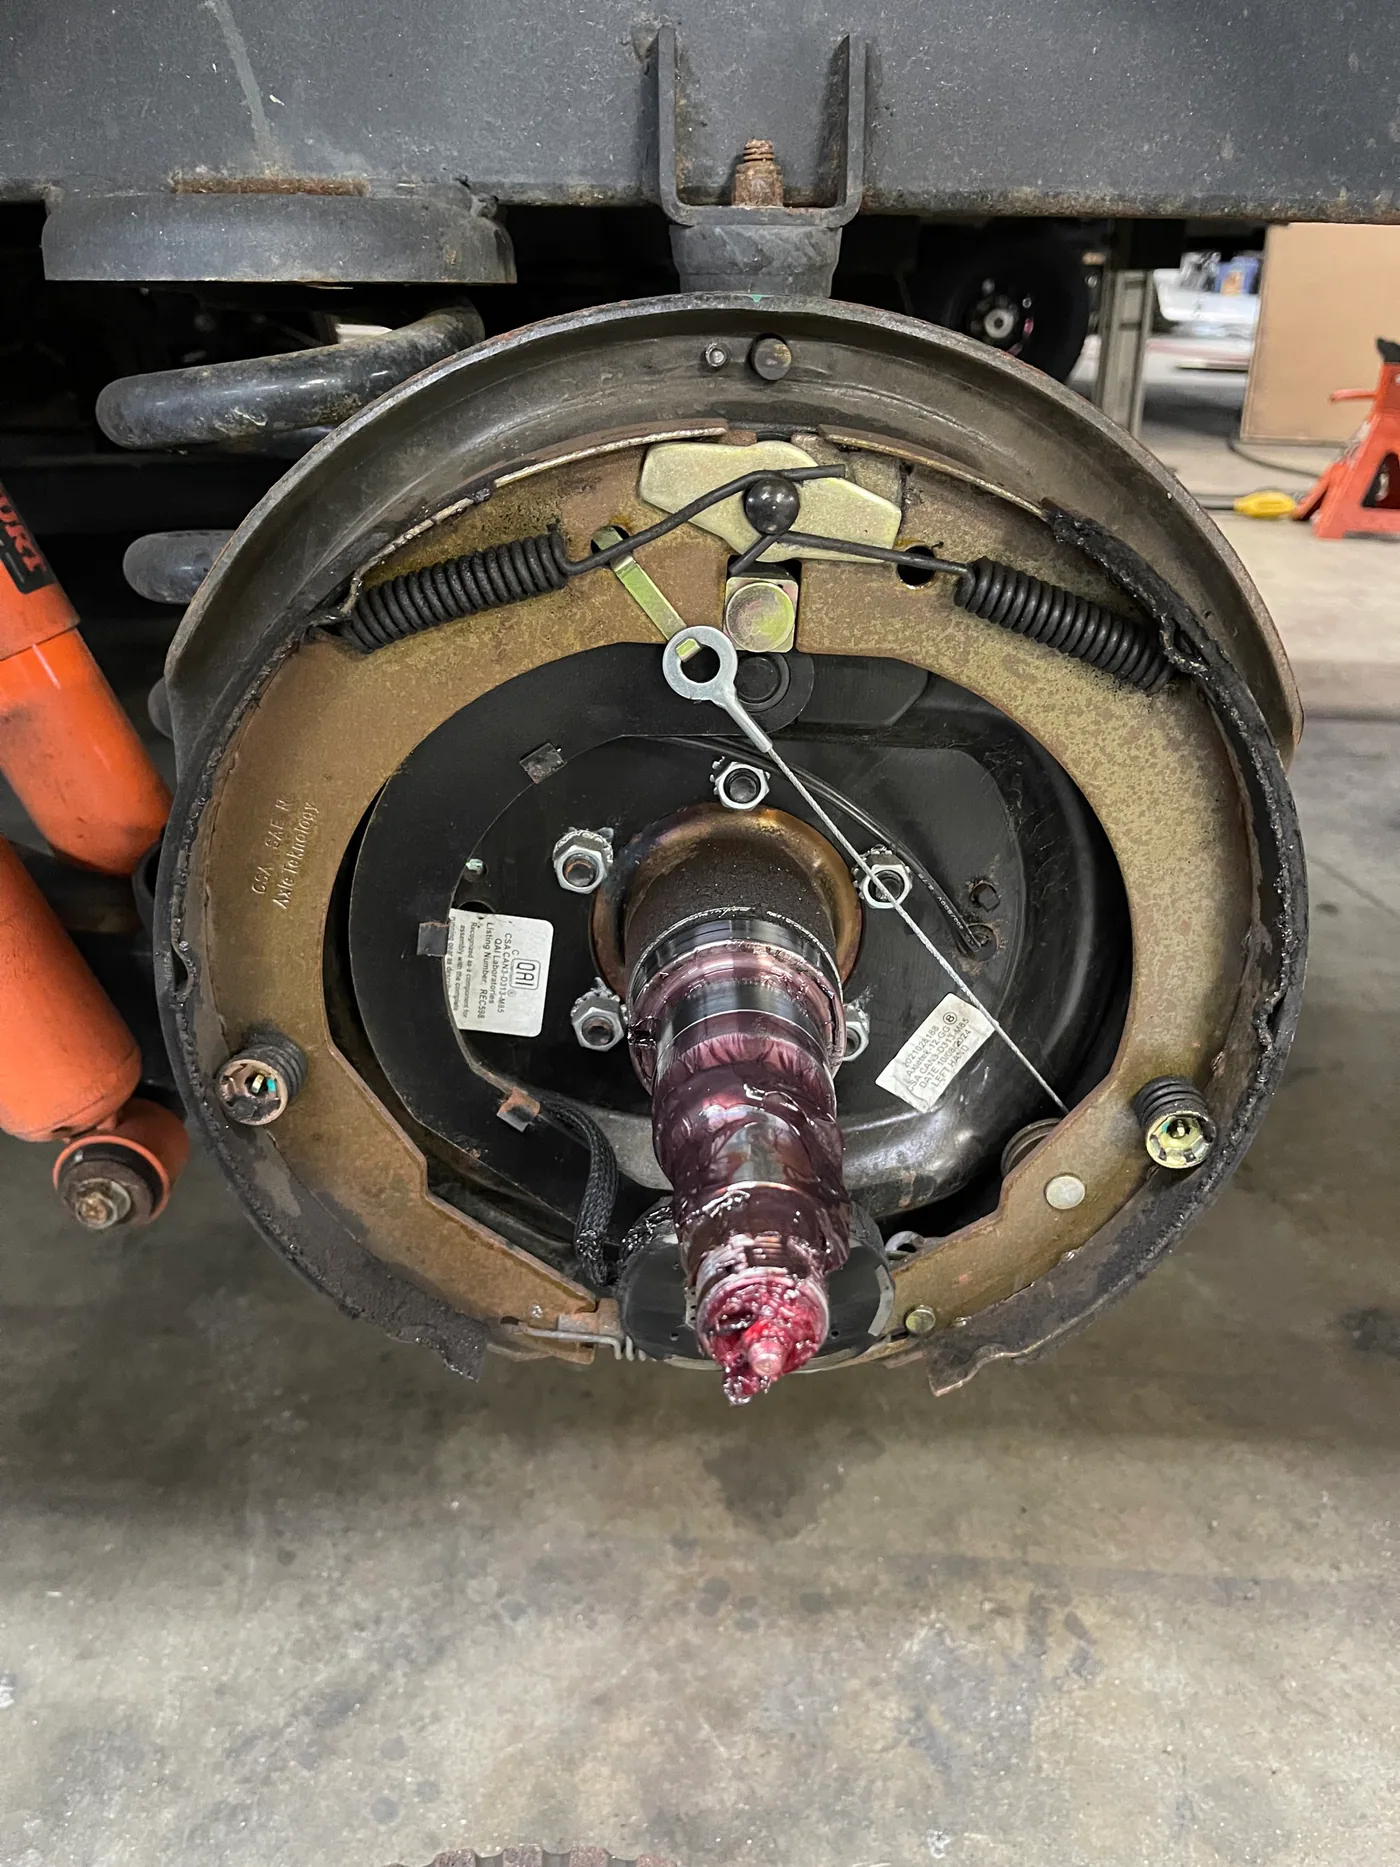
When the controller sends current through the brake magnet, the spinning drum pulls the magnet and actuating arm. That movement spreads the shoes against the drum. The wiring, magnet, arm, adjuster, shoes, springs and drum all have to work together; a healthy controller cannot overcome oil-soaked shoes or a seized mechanism.
Check the controller and seven-way connection
- Confirm the controller recognizes the trailer and is set for electric—not electric-over-hydraulic—brakes.
- Use the controller’s manual lever at low speed in a safe open area. The trailer brakes should slow the combination without the tow-vehicle service brakes doing all the work.
- Inspect the seven-way plug for corrosion, looseness, heat damage, pushed-back terminals and a cable that pulls tight in turns.
- Check the trailer ground where it attaches to the frame. A light circuit working does not prove the brake circuit has a low-resistance ground under load.
- Set gain for the trailer’s actual loaded condition according to the controller instructions. A number that worked empty may be wrong after loading.
Compare every wheel before replacing parts
With the trailer safely supported as its manufacturer specifies, compare each brake rather than judging one in isolation. A manual-override test may produce a soft hum or magnetic pull at the drums. A silent wheel is a useful clue, but noise alone does not prove that the magnet receives proper current or that the shoes apply. Voltage and current tests must follow the axle and controller manuals because expected readings depend on brake size and system configuration.
Adjustment matters—even with good voltage
Manual-adjust brakes can become weak as shoe-to-drum clearance grows. Forward self-adjusting assemblies still need correct initial setup and inspection; do not assume every brake on the trailer is self-adjusting just because one replacement assembly was. Identify the axle and brake by its tag or serial information.
Adjust every wheel to the same manufacturer procedure. Dexter’s light-duty guidance describes expanding the shoes until the wheel is difficult to turn, then backing off until it turns freely with slight lining drag. Do not use that wording as a substitute for the manual if the axle is another brand or brake design.
Open-drum inspection: what makes a brake unsafe
- Grease or oil on the shoes or drum: repair the failed seal or source and replace contaminated friction parts as required. Solvent does not reliably restore soaked lining.
- Cracked, loose, excessively worn or scored lining: compare with the manufacturer’s service limit and replace the matched assembly or parts.
- Stretched, broken or misplaced springs: the shoes may drag, apply unevenly or fail to return.
- Scored or uneven magnet face: inspect the drum armature surface and magnet to the axle maker’s limits.
- Loose, pinched or heat-damaged wires: repair with protected connections suitable for vibration and road exposure.
- Blue, cracked or deeply scored drum: excessive heat or damage needs measurement and professional evaluation.
Tools, difficulty and likely repair scope
- Owner-level checks: Controller status, seven-way condition, breakaway-battery condition, visible wiring and cautious temperature comparison.
- Service tools: Rated wheel chocks and stands, torque wrench, brake-adjusting tool, multimeter or suitable clamp meter, drum and lining measuring tools, and the exact axle manual.
- Difficulty: Intermediate to advanced. A heavy trailer, bearing adjustment and brake dust raise the risk quickly.
- Typical repair scope: Wiring or adjustment may be minor; contaminated shoes usually lead to seal repair and matched brake service, while damaged drums or bearings add parts and labor.
Do not forget the breakaway system
The breakaway switch, cable and battery are a separate emergency system. Test them only by the RV, axle and breakaway manufacturer’s instructions, and do not use the breakaway pin as a parking brake. A charged battery and working switch are essential, but pulling the pin repeatedly can overheat magnets or damage equipment if the manual’s time limits are ignored.
After repair: burnish, set gain and verify temperatures
New shoes and drums may need a manufacturer-specified burnish procedure before delivering full braking. After the repair, set controller gain again with the RV loaded, make a cautious test in a traffic-free area, then stop and compare wheel temperatures without touching the drums. One wheel that is dramatically hotter or colder than the others still needs diagnosis.
FAQ
Why are my RV trailer brakes weak even with high controller gain?
Under-adjustment, low voltage under load, a bad ground, contaminated shoes, weak magnets, new brakes that were not burnished or incorrect controller setup can all make high gain ineffective.
How can I tell whether an electric trailer brake magnet works?
A hum or magnetic pull during manual override is a clue, not a complete test. Compare wheels and use the axle maker’s voltage/current procedure.
Can grease make electric trailer brakes stop working?
Yes. A failed hub seal can coat the shoes and drum. Repair the leak and replace contaminated friction parts according to the axle manual.
How often should RV trailer brakes be inspected?
Follow the axle manufacturer. Dexter guidance includes an operational check before use, periodic adjustment where applicable and regular inspections of linings, magnets, wiring and breakaway equipment.
Related trailer brake and towing help
- Complete electric trailer brake troubleshooting guide
- Trailer brakes feel weak
- Brake controller says no trailer
- Trailer brakes lock up or grab
- One trailer wheel or hub is hot
- Test the trailer breakaway system
- Grease on Dexter E-Z Lube brakes
- Wheel bearing and hot-hub inspection guide
- RV tire blowout prevention
- Towing troubleshooter
Sources and review notes
Reviewed July 13, 2026. Axle capacity, brake size, adjustment direction, service limits, current draw and torque values must come from the exact axle and brake documentation.
Not sure whether it is wiring or the wheel?
The towing troubleshooter separates controller, connector, brake, hub, tire and sway symptoms.
Open towing diagnosisFind RV service